Support our educational content for free when you purchase through links on our site. Learn more
Organic Gardening for Beginners: Grow More with Less 🌱

Organic Gardening for Beginners starts with three things: a sunny spot, healthy soil, and a small crop list you’ll actually enjoy eating. Build from there with compost, sensible watering, and pest prevention before reaching for sprays or fertilizers.
Our first garden taught us that enthusiasm grows faster than vegetables. We planted too much, underestimated the weeds, and discovered that one zucchini plant can be surprisingly generous. Starting small makes it easier to learn what your soil, weather, and favorite crops need.
You don’t need a perfect plot or a shed full of tools. A few containers or one well-planned bed can teach you how to grow food while supporting soil life and beneficial insects—and give you a very good reason to eat more salad.
Key Takeaways
- Start small: Choose a manageable bed or a few containers, then expand as you learn.
- Put soil first: Test your soil and use finished compost or other amendments based on what it needs.
- Pick crops for your space: Match plants to your sunlight, local growing season, and dinner table.
- Prevent problems early: Rotate crops, mulch, water thoughtfully, and check plants regularly.
- Identify pests before acting: Some insects help your garden; use targeted, low-impact controls when needed.
- Keep it practical: A notebook, basic tools, and consistent observation beat a complicated setup.
Table of Contents
- ⚡ Quick Tips and Facts for Organic Gardening Beginners
- 🌱 What Is Organic Gardening?
- 📜 How Organic Gardening Grew: A Brief History
- 🌼 Benefits of Organic Gardening
- 🗺️ Planning Your First Organic Garden
- Choosing a Garden Site and Growing Space
- How Much Sun Do Vegetables Need?
- In-Ground Beds, Raised Beds, or Containers?
- Designing a Beginner-Friendly Garden Layout
- 🧑 🌾 Getting Started: A Step-by-Step Organic Garden Plan
- What to Grow in Your First Garden
- When to Plant: Frost Dates and Growing Seasons
- A Simple First-Year Garden Calendar
- 🌿 Organic Seeds, Seedlings, and Plant Selection
- How to Choose Organic Seeds
- Open-Pollinated, Heirloom, and Hybrid Seeds Explained
- Starting Seeds Indors vs. Buying Transplants
- Finding Healthy Organic Seedlings
- 🪴 Healthy Soil: The Foundation of Organic Gardening
- How to Test and Understand Your Garden Soil
- Soil Texture, Structure, pH, and Drainage
- Improving Clay, Sandy, and Compacted Soil
- No-Dig Gardening and Protecting Soil Life
- ♻️ Composting for Organic Gardens
- What to Put in a Compost Pile
- Compost Greens and Browns: Getting the Balance Right
- How to Make and Use Finished Compost
- Composting Troubleshooting and Common Mistakes
- 🌾 Organic Fertilizers and Natural Soil Amendments
- Compost, Manure, and Other Organic Matter
- Organic Fertilizer Types and When to Use Them
- How to Read Fertilizer Labels and Avoid Overfeeding
- 🍂 Mulching for Moisture, Weds, and Soil Health
- Best Organic Mulches for Vegetable Gardens
- When and How to Apply Mulch
- 💧 Watering and Caring for Organic Garden Plants
- How Often to Water a Vegetable Garden
- Drip Irrigation, Soaker Hoses, and Water-Saving Tips
- Weding Without Synthetic Herbicides
- Pruning, Staking, and Supporting Crops
- 🔄 Crop Rotation and Succession Planting
- Why Crop Rotation Helps Prevent Pests and Disease
- A Simple Crop Rotation Plan for Beginners
- Succession Planting for a Longer Harvest
- 🤝 Companion Planting in the Organic Garden
- Companion Planting Combinations That Make Sense
- What Companion Planting Can—and Cannot—Do
- 🐞 Beneficial Insects and Garden Biodiversity
- How to Atract Pollinators and Predatory Insects
- Recognizing Helpful Garden Insects
- Creating Habitat with Flowers, Hedges, and Water
- 🐛 Natural Pest Control and Organic Disease Management
- The Organic Integrated Pest Management Approach
- Preventing Common Vegetable Garden Pests
- Identifying and Managing Plant Diseases
- Physical Bariers, Hand-Picking, and Other Controls
- Using Organic Pesticides Responsibly
- 🚫 Avoiding Synthetic Fertilizers, Pesticides, and Herbicides
- What “Organic” Means for a Home Garden
- Safer Choices for Garden Inputs
- 🥕 Harvesting and Storing Organic Garden Produce
- When and How to Harvest Vegetables
- Washing, Storing, and Preserving Your Harvest
- Saving Seeds for Next Season
- ❄️ Seasonal Organic Garden Care
- Spring Garden Preparation
- Summer Garden Maintenance
- Fall Cleanup and Winter Soil Protection
- 🪴 Organic Gardening in Containers and Small Spaces
- Choosing Pots, Planters, and Organic Poting Mix
- Best Vegetables for Containers
- Balcony, Patio, and Vertical Gardening Ideas
- 🌍 Sustainable Gardening: Water, Wildlife, and Waste
- Rainwater Harvesting and Water Conservation
- Reducing Garden Waste and Reusing Materials
- Gardening for Soil Carbon and Local Wildlife
- 🧰 Organic Gardening Tools and Supplies
- Essential Tools for a Beginner Gardener
- Useful Supplies You Can Skip at First
- ⚠️ Common Organic Gardening Mistakes and How to Fix Them
- 📚 Related Reading and Popular How-Tos
- ✅ Conclusion
- 🔗 Recommended Links
- ❓ FAQ
- Is organic gardening hard for beginners?
- Can I start an organic garden in poor soil?
- Do organic gardens need fertilizer?
- How do I control pests without chemicals?
- What is the easiest vegetable to grow organically?
- Can I garden organically in pots?
- How do I know whether seeds are certified organic?
- 📖 Reference Links
Table of Contents
- ⚡ Quick Tips and Facts for Organic Gardening Beginners
- 🌱 What Is Organic Gardening?
- 📜 How Organic Gardening Grew: A Brief History
- 🌼 Benefits of Organic Gardening
- 🗺️ Planning Your First Organic Garden
- Choosing a Garden Site and Growing Space
- How Much Sun Do Vegetables Need?
- In-Ground Beds, Raised Beds, or Containers?
- Designing a Beginner-Friendly Garden Layout
- 🧑 🌾 Getting Started: A Step-by-Step Organic Garden Plan
- What to Grow in Your First Garden
- When to Plant: Frost Dates and Growing Seasons
- A Simple First-Year Garden Calendar
- 🌿 Organic Seeds, Seedlings, and Plant Selection
- How to Choose Organic Seeds
- Open-Pollinated, Heirloom, and Hybrid Seeds Explained
- Starting Seeds Indors vs. Buying Transplants
- Finding Healthy Organic Seedlings
- 🪴 Healthy Soil: The Foundation of Organic Gardening
- How to Test and Understand Your Garden Soil
- Soil Texture, Structure, pH, and Drainage
- Improving Clay, Sandy, and Compacted Soil
- No-Dig Gardening and Protecting Soil Life
- ♻️ Composting for Organic Gardens
- What to Put in a Compost Pile
- Compost Greens and Browns: Getting the Balance Right
- How to Make and Use Finished Compost
- Composting Troubleshooting and Common Mistakes
- 🌾 Organic Fertilizers and Natural Soil Amendments
- Compost, Manure, and Other Organic Matter
- Organic Fertilizer Types and When to Use Them
- How to Read Fertilizer Labels and Avoid Overfeeding
- 🍂 Mulching for Moisture, Weds, and Soil Health
- Best Organic Mulches for Vegetable Gardens
- When and How to Apply Mulch
- 💧 Watering and Caring for Organic Garden Plants
- How Often to Water a Vegetable Garden
- Drip Irrigation, Soaker Hoses, and Water-Saving Tips
- Weding Without Synthetic Herbicides
- Pruning, Staking, and Supporting Crops
- 🔄 Crop Rotation and Succession Planting
- Why Crop Rotation Helps Prevent Pests and Disease
- A Simple Crop Rotation Plan for Beginners
- Succession Planting for a Longer Harvest
- 🤝 Companion Planting in the Organic Garden
- Companion Planting Combinations That Make Sense
- What Companion Planting Can—and Cannot—Do
- 🐞 Beneficial Insects and Garden Biodiversity
- How to Atract Pollinators and Predatory Insects
- Recognizing Helpful Garden Insects
- Creating Habitat with Flowers, Hedges, and Water
- 🐛 Natural Pest Control and Organic Disease Management
- The Organic Integrated Pest Management Approach
- Preventing Common Vegetable Garden Pests
- Identifying and Managing Plant Diseases
- Physical Bariers, Hand-Picking, and Other Controls
- Using Organic Pesticides Responsibly
- 🚫 Avoiding Synthetic Fertilizers, Pesticides, and Herbicides
- What “Organic” Means for a Home Garden
- Safer Choices for Garden Inputs
- 🥕 Harvesting and Storing Organic Garden Produce
- When and How to Harvest Vegetables
- Washing, Storing, and Preserving Your Harvest
- Saving Seeds for Next Season
- ❄️ Seasonal Organic Garden Care
- Spring Garden Preparation
- Summer Garden Maintenance
- Fall Cleanup and Winter Soil Protection
- 🪴 Organic Gardening in Containers and Small Spaces
- Choosing Pots, Planters, and Organic Poting Mix
- Best Vegetables for Containers
- Balcony, Patio, and Vertical Gardening Ideas
- 🌍 Sustainable Gardening: Water, Wildlife, and Waste
- Rainwater Harvesting and Water Conservation
- Reducing Garden Waste and Reusing Materials
- Gardening for Soil Carbon and Local Wildlife
- 🧰 Organic Gardening Tools and Supplies
- Essential Tools for a Beginner Gardener
- Useful Supplies You Can Skip at First
- ⚠️ Common Organic Gardening Mistakes and How to Fix Them
- 📚 Related Reading and Popular How-Tos
- ✅ Conclusion
- 🔗 Recommended Links
- ❓ FAQ
- How do I start an organic garden as a beginner?
- What are the easiest organic vegetables to grow at home?
- How can I improve garden soil naturally without chemicals?
- What natural methods can I use to control pests in an organic garden?
- How often should I water an organic vegetable garden?
- Can organic gardening help reduce my environmental footprint?
- How can I grow healthy food organically in a small space?
- 📖 Reference Links
⚡ Quick Tips and Facts for Organic Gardening Beginners
- Start small: A well-tended 4-by-8-foot bed can teach you more (and produce more) than a sprawling plot that turns into a weed safari. Mother Earth News makes the same case: “A small area well cared for will yield more than a large plot that is neglected.” Read its beginer vegetable gardening guide.
- Give vegetables enough light: Most fruiting crops do best with at least 6–8 hours of direct sunlight. Leafy greens and some herbs tolerate partial shade. Check crop-specific guidance from the University of Minnesota Extension.
- Build soil before chasing products: Begin with a soil test and mature compost. The USDA Natural Resources Conservation Service explains why soil health depends on living organisms, organic matter, structure, and water movement.
- Water deeply, not by the calendar: Check the soil and weather. A fixed “once a week” rule can be too little in a heatwave and too much in cool, wet weather.
- Identify pests before acting: Not every bug is a villain. A lady beetle larva looks a little like a tiny armored alligator, but it eats aphids for breakfast.
- Choose locally suitable crops: Your climate, planting season, and available sun matter more than a glamorous seed-catalog description.
- Keep a garden log: Note planting dates, varieties, harvests, pest flare-ups, and what you’d change. Your garden will hand you clues; a notebook helps you keep them.
- Organic doesn’t mean “spray anything labeled natural.” Some organic-approved pesticides can still harm pollinators or other organisms. Read the label and use the least-disruptive option.
- The simplest beginner formula: sunlight + healthy soil + suitable plants + steady moisture + regular observation.
For a healthy growing space around your home, our Green Home guide has ideas for making indoor and outdoor spaces work better together.
| Beginner question | A reliable first move | Avoid this trap |
|---|---|---|
| What should I grow? | Pick 3–5 crops you like eating and that suit your climate | Planting every seed packet in the shop |
| What should I add to soil? | Test first; use finished compost where appropriate | Adding lime or fertilizer by guesswork |
| How do I handle pests? | Identify the organism, then monitor and intervene selectively | Spraying every insect on sight |
| How often should I water? | Check soil moisture and plant condition | Watering by a rigid weekly schedule |
| How large should my garden be? | Start with a manageable bed or a few containers | Building a huge garden before learning its workload |
🌱 What Is Organic Gardening?
Organic gardening is a way of growing plants that supports soil health and ecological processes while avoiding prohibited synthetic inputs. It relies on practices such as composting, crop rotation, mulching, careful watering, biodiversity, and integrated pest management.
For a home garden, “organic” is often used to describe a gardening approach, but it does not automatically mean the produce is certified organic. In the United States, organic certification applies to farms and businesses that meet USDA National Organic Program standards. A home gardener can follow organic principles without being certified.
| Organic gardening principle | What it looks like at home |
|---|---|
| Feed the soil | Add mature compost and protect soil with mulch |
| Work with nature | Encourage pollinators, predators, and soil organisms |
| Prevent problems early | Choose adapted varieties, rotate crops, and monitor plants |
| Use targeted controls | Remove a specific pest rather than treating the whole garden |
| Minimize unnecessary inputs | Test soil before applying amendments or fertilizer |
Organic gardening isn’t a promise of a pest-free Eden where every tomato arrives wearing a tiny halo. It’s a system for keeping plants productive while limiting avoidable harm. Garden Design puts it plainly: “The goal is to not completely eliminate pests, but to control them enough so they don’t cause serious damage to plants.” See its overview of organic gardening methods.
That distinction matters. A few aphids can feed beneficial insects; a serious infestation that curls new growth may need action. The aim is balance, not biological perfection.
📜 How Organic Gardening Grew: A Brief History
Organic gardening draws on long-standing practices: composting plant matter, saving seed, rotating crops, using animal manure, and observing relationships between plants, soil, and insects. These methods existed well before the modern “organic” label.
The word organic became associated with a broader agricultural movement during the 20th century, as concerns grew about soil degradation and reliance on industrial inputs. Today, organic agriculture has formal standards in many countries, while home gardeners often use the word to describe soil-building, low-synthetic-input growing practices.
It’s useful to separate two ideas:
- Organic methods: The practices you use, such as composting, mulching, and nonchemical pest prevention.
- Organic certification: A regulated status for eligible farms and products that meet specified standards.
The USDA explains organic certification and labeling. For a household garden, the practical takeaway is simple: you can garden organically without certification, but don’t label homegrown produce as “USDA Certified Organic” unless it actually meets certification requirements.
🌼 Benefits of Organic Gardening
A productive garden can give you fresh food, outdoor time, and a better relationship with what grows in your neighborhood. The benefits depend on how you garden, where your supplies come from, and what you grow, so let’s keep the claims grounded rather than promising that a row of kale will solve every problem in life.
Soil and water benefits
Using compost, mulch, diverse planting, and reduced soil disturbance can support soil structure, water retention, and biological activity. The USDA NRCS soil health principles focus on keeping soil covered, minimizing disturbance, maintaining living roots, and increasing diversity.
Food, skills, and enjoyment
A home garden can put herbs and vegetables close at hand, help you learn seasonal rhythms, and make cooking feel more connected to the source of your food. Gardening also gets you moving outdoors, though it’s not a substitute for medical care or a guaranteed mental-health treatment.
Potential environmental upsides
Growing locally can reduce some packaging and transport associated with particular foods, but the environmental result depends on the whole picture: water use, purchased materials, heating, soil management, and whether the garden replaces or adds to other consumption. Explore more practical ideas in Gone Greenish’s Carbon Footprint Reduction and Biodiversity Conservation collections.
| Potential benefit | How to support it | A realistic caveat |
|---|---|---|
| Better soil structure | Add appropriate organic matter and avoid working wet soil | Compost quality and soil conditions matter |
| Less water loss | Mulch and water near the root zone | Some crops still need frequent watering in hot weather |
| More habitat | Plant flowers and preserve safe shelter for wildlife | A single flower patch won’t replace natural habitat |
| Fresh produce | Grow crops you actually eat | Harvests vary with weather, pests, and experience |
| Fewer unnecessary chemicals | Use prevention and targeted controls | “Natural” products still need careful use |
🗺️ Planning Your First Organic Garden
Before buying seeds, answer four questions: Where will the garden go? How much sun does it get? How will you water it? What do you actually want to harvest? A little planning now can spare you from the classic beginner plot: six zucchini plants, one lonely salad, and a hose that can’t reach any of them.
Choosing a Garden Site and Growing Space
Choose a site with good light, accessible water, and convenient access from your home. A garden you pass daily is easier to monitor and weed than one tucked behind the shed like a forgotten science project.
Check for:
- Sun exposure: Track direct sunlight over a clear day.
- Drainage: Avoid spots where water pools after rain.
- Water access: A nearby outdoor tap or rainwater system makes routine care easier.
- Wind exposure: Strong wind can dry soil and damage tall plants.
- Trees and roots: Large trees compete for light, water, and nutrients.
- Soil safety: If growing in older urban sites or areas with possible contamination, consider testing before growing food. Your local extension service can advise on appropriate tests.
The University of Maryland Extension explains soil testing and interpretation. If you suspect lead or another contaminant, ask a qualified local lab or public health agency what to test for; a generic garden test may not cover every concern.
How Much Sun Do Vegetables Need?
Many fruiting crops—such as tomatoes, peppers, cucumbers, and squash—need around 6–8 hours of direct sun for strong production. Leafy greens, some herbs, and a few root crops can tolerate less, though growth may be slower.
| Light at the garden site | Crops that may suit it |
|---|---|
| 8+ hours of direct sun | Tomatoes, peppers, squash, cucumbers, beans |
| 6–8 hours | Many vegetables, including carrots, bets, and leafy crops |
| 4–6 hours or bright partial shade | Lettuce, spinach, arugula, parsley, some herbs |
| Less than 4 hours | Consider shade-tolerant ornamentals, microgreens, or a different site |
Sun requirements vary by variety and climate. In very hot regions, afternoon shade can help cool-season greens, but it may reduce the yield of sun-loving fruit crops. For crop-specific growing advice, use your state university extension service or local gardening program.
In-Ground Beds, Raised Beds, or Containers?
There isn’t one universally best format. A raised bed may solve poor drainage or inaccessible soil; an in-ground bed can be economical and hold moisture well; containers are useful where space is limited but dry out faster.
| Garden type | Best for | Advantages | Trade-offs |
|---|---|---|---|
| In-ground bed | Suitable soil and available yard space | Lower setup needs; roots can explore deeper soil | Soil may be compacted, poorly drained, or unsafe for food crops |
| Raised bed | Poor drainage, compacted ground, easier access | Clear boundaries; customizable growing mix | Needs filling; can dry faster and may require more frequent watering |
| Container | Patios, balconies, renters, small spaces | Flexible location; controlled growing mix | Limited root volume; drainage and watering need attention |
| Grow bags | Temporary or portable growing | Easy to move; many sizes available | Can dry quickly; fabric quality and durability vary |
For raised beds, avoid filling a deep bed entirely with purchased poting mix unless the crop needs it. A suitable blend depends on bed depth, local soil, and intended crops. The University of Minnesota Extension’s raised-bed guidance offers practical setup advice.
Designing a Beginner-Friendly Garden Layout
Keep beds narrow enough to reach the middle without stepping on the soil. Arrange tall crops so they don’t shade shorter ones; in many Northern Hemisphere gardens, tall plants work well on the north side, though local sun direction and layout can change the best arrangement.
A simple first-year design might include:
- One bed for easy, quick crops: lettuce, radishes, spinach, or bush beans.
- One bed for longer-season favorites: tomatoes, peppers, or squash, with supports planned from the start.
- A small herb area: parsley, basil, chives, or thyme, depending on climate.
- Flowers at the edges: choose locally suitable flowers that provide nectar and pollen.
Don’t plant everything at once. Leave room to reach, harvest, and replant. A garden is not a jigsaw puzzle where every empty inch is a personal failure.
🧑 🌾 Getting Started: A Step-by-Step Organic Garden Plan
Here’s a low-drama way to get your first season moving.
What to Grow in Your First Garden
Start with crops you enjoy eating, can grow in your climate, and can harvest before they become a full-time job. Beginner-friendly options often include:
- Leaf lettuce: Quick-growing and easy to harvest a little at a time.
- Radishes: Fast, rewarding, and useful for learning how to sow thinly.
- Bush beans: Usually straightforward and productive in warm weather.
- Zuchini: Productive, but one or two plants can be plenty.
- Cherry tomatoes: Good for containers if you choose a suitable variety and provide support.
- Herbs: Chives, parsley, and basil can be useful kitchen crops.
- Swiss chard: A productive leafy crop in many climates.
Mother Earth News names snap beans, zucchini, tomatoes, bets, carrots, radishes, and lettuce among reliable crops, while advising beginners to leave more demanding crops such as corn and melons for later. Its varieties and timing reflect its own growing conditions, so use them as inspiration—not a universal planting prescription.
When to Plant: Frost Dates and Growing Seasons
Planting dates depend on your local climate and the crop’s tolerance for cold. Cool-season crops such as peas, spinach, and lettuce can often be planted before the last spring frost. Warm-season crops such as tomatoes, beans, and squash generally need warmer soil and frost-free weather.
Use these tools to find your local timing:
- USDA Plant Hardiness Zone Map for average winter minimum temperatures.
- National Weather Service forecasts and frost alerts.
- Your state or regional university extension for planting calendars and local crop guidance.
Hardiness zones are not planting calendars. They help describe winter temperatures, but they don’t tell you when your soil is warm enough to sow beans or how long your local growing season lasts.
A Simple First-Year Garden Calendar
| Season or timing | Tasks |
|---|---|
| Late winter | Choose crops, order seeds, plan bed layout, check local planting calendars |
| Early spring | Test soil, prepare beds when soil is workable, sow suitable cool-season crops |
| After frost risk | Plant warm-season crops when local conditions and soil temperatures are suitable |
| Early summer | Mulch, monitor pests, water as needed, sow short-season crops in open spaces |
| Mid-to-late summer | Harvest regularly, replant where space opens, watch for heat and drought stress |
| Fall | Harvest cool-season crops, remove diseased plants, protect bare soil with mulch or cover crops |
| Winter | Review notes, clean and store tools, plan crop rotation |
The calendar is a framework, not a commandment. Local weather gets the final vote.
🌿 Organic Seeds, Seedlings, and Plant Selection
A healthy garden begins with plants suited to your region and growing conditions. Seeds are usually the most flexible option; transplants can simplify the first season. Both can work beautifully.
How to Choose Organic Seeds
Look for seed packets that state the seed is certified organic if that distinction matters to you. In the U.S., certified organic seeds are produced under applicable USDA organic standards. Check the packet for:
- Crop and variety name
- Days to maturity, remembering this is an estimate
- Planting depth and spacing
- Whether the variety is suited to your region
- Disease-resistance codes, where listed
- Whether it is open-pollinated or hybrid
Organic seed selection can be narrower for some crops, and availability changes by season. A reputable seed company should provide clear variety information and growing instructions. Examples include Johnny’s Selected Seeds, High Mowing Organic Seeds, and Fedco Seeds. Check each company’s current product details and certification information rather than assuming every item it sells is organic.
Open-Pollinated, Heirloom, and Hybrid Seeds Explained
| Seed type | What it means | Seed-saving potential |
|---|---|---|
| Open-pollinated | Pollinated naturally within a variety, with offspring generally resembling the parent when isolated appropriately | Often suitable |
| Heirloom | A traditional variety, usually open-pollinated and maintained over generations | Often suitable |
| Hybrid (F1) | A controlled cross between parent lines for specific traits | Saved seed may not produce plants true to type |
A hybrid isn’t automatically genetically modified, and “heirloom” isn’t a guarantee of disease resistance or easy growing. Choose based on your goals: flavor, storage, disease resistance, local adaptation, or saving seed.
Starting Seeds Indors vs. Buying Transplants
Starting seeds indoors gives you more variety and can be satisfying, but it requires clean containers, suitable light, careful watering, and timing. Buying transplants is often simpler for a first garden, especially for a few tomatoes or peppers.
| Option | Choose it when… | Keep in mind |
|---|---|---|
| Direct sow outdoors | Crops dislike root disturbance or grow quickly from seed, such as carrots and radishes | Soil temperature and moisture matter |
| Start indoors | You want more variety or need a head start on long-season crops | Seedlings need adequate light and gradual hardening off |
| Buy transplants | You want a simpler start or just a few plants | Inspect roots and leaves; avoid stressed or pest-infested plants |
The University of Minnesota Extension seed-starting guide explains timing, light, and transplant care.
Finding Healthy Organic Seedlings
Look for compact plants with sturdy stems, healthy green leaves, and no obvious pests, spots, or wilting. Avoid seedlings that are severely root-bound, flowering too early for their size, or packed with weeds.
Before planting indoor-grown seedlings outside, harden them off: gradually expose them to outdoor conditions over several days, protecting them from harsh sun, wind, and cold at first. This small transition prevents the botanical equivalent of being dropped into a snowstorm after a tropical vacation.
🪴 Healthy Soil: The Foundation of Organic Gardening
Healthy soil is more than dirt with a good publicist. It’s a living, layered system of mineral particles, organic matter, air, water, roots, fungi, bacteria, and other organisms. Organic gardening works best when we feed and protect the soil ecosystem, rather than trying to force a quick result with repeated inputs.
How to Test and Understand Your Garden Soil
A soil test can tell you important information about pH and nutrient levels, helping prevent both deficiencies and unnecessary amendments. Contact your local university extension or a trusted soil lab for sampling instructions and a test suited to food gardening.
Basic sampling steps often include:
- Use a clean trowel and bucket.
- Collect small samples from several spots in the garden bed.
- Sample at the depth recommended by the lab.
- Mix the samples thoroughly.
- Submit the amount requested, and tell the lab what you plan to grow.
Don’t add lime, sulfur, phosphorus, or “soil sweetener” based on a guess. Soil tests are especially helpful before correcting pH or applying nutrients that can accumulate.
Soil Texture, Structure, pH, and Drainage
Texture describes the relative amounts of sand, silt, and clay. Structure describes how those particles form aggregates. A soil may be clayey but still have good structure, or sandy but enriched with organic matter.
| Soil clue | What it may suggest | Practical response |
|---|---|---|
| Grity feel | More sand | Add suitable organic matter; monitor moisture |
| Sticky when wet, hard when dry | More clay | Avoid working it wet; add compost and protect the surface |
| Smooth or floury feel | More silt | Maintain organic matter and avoid compaction |
| Water pools after rain | Poor drainage or compaction | Investigate drainage; consider a raised bed |
| Soil dries very quickly | Low water-holding capacity, shallow roots, or heat exposure | Mulch and improve organic matter over time |
Soil pH affects nutrient availability, but most common vegetables tolerate a moderately broad range. Follow your soil test’s crop-specific recommendations rather than trying to create perfect pH for every plant.
Improving Clay, Sandy, and Compacted Soil
For many garden soils, adding finished compost or other appropriate organic matter helps improve structure over time. It can increase water-holding capacity in sandy soil and improve aggregation in clay soil. Results are gradual; one bag of compost won’t perform a dramatic soil makeover by Tuesday.
- Clay soil: Avoid digging or walking on it when wet. Use permanent paths and add modest amounts of mature compost.
- Sandy soil: Add compost, use mulch, and water with care because nutrients and moisture may move through quickly.
- Compacted soil: Reduce foot traffic, use broadforking or gentle loosening only when appropriate, and maintain roots or cover crops where possible.
- Poorly drained soil: Consider raised beds, but first understand whether the problem is surface water, a high water table, or compaction.
Avoid adding sand to clay as a quick fix; the wrong proportions can create dense, concrete-like soil. For specific local recommendations, consult your Coperative Extension office.
No-Dig Gardening and Protecting Soil Life
No-dig gardening minimizes routine turning of soil. It can preserve soil structure and reduce disturbance, especially when beds are kept covered and organic matter is added at the surface. It is not a magic rule that says never loosen soil; compacted ground, perennial weeds, or a new bed may need targeted preparation.
Try this gentle approach:
- Remove persistent perennial weeds without scattering their roots.
- Spread a layer of mature compost on the bed surface.
- Add mulch suited to the crop and season.
- Plant into the bed with minimal disturbance.
- Keep paths separate from growing areas.
The USDA NRCS soil health principles emphasize minimizing disturbance and keeping soil covered. That doesn’t mean every garden must follow a strict no-dig method; match the approach to your soil and weeds.
♻️ Composting for Organic Gardens
Composting turns suitable organic scraps into a useful soil amendment and keeps some biodegradable material out of the waste stream. It’s a satisfying loop: yesterday’s vegetable trimmings become part of next season’s soil. But compost is not a complete fertilizer by default, and it isn’t a safe dumping ground for every household scrap.
What to Put in a Compost Pile
Good compost materials commonly include:
- Fruit and vegetable scraps
- Coffee grounds and paper filters
- Crushed eggshells
- Dry leaves
- Untreated grass clippings in moderate amounts
- Small plant trimmings
- Shredded uncoated cardboard and paper
Avoid or use caution with:
- Meat, fish, dairy, fats, and cooked foods that attract pests in open piles
- Pet waste, which can carry pathogens
- Diseased plants or persistent weeds with mature seeds
- Chemically treated wood, glossy paper, and synthetic materials
Rules vary by compost system. A managed hot-compost process may handle more material than a small backyard pile, but the temperature and handling must be appropriate. The US EPA composting guide covers household compost basics.
Compost Greens and Browns: Getting the Balance Right
Composting works best with a mix of greens (often nitrogen-rich, moist materials) and browns (often carbon-rich, dry materials). Think salad scraps plus dry leaves—not a precise chemistry exam.
| “Grens” | “Browns” |
|---|---|
| Vegetable and fruit scraps | Dry leaves |
| Fresh grass clippings | Straw |
| Coffee grounds | Shredded uncoated cardboard |
| Fresh plant trimmings | Small amounts of untreated paper |
If the pile smells sour or rotten, it may be too wet or compacted; add dry browns and improve airflow. If it’s dry and inactive, add moisture and mix in more green material.
How to Make and Use Finished Compost
A basic compost process:
- Choose a well-drained bin or pile location.
- Add a blend of browns and greens.
- Keep the pile as damp as a wrung-out sponge.
- Turn or mix it occasionally if your system calls for aeration.
- Let it mature until it is dark, crumbly, and earthy-smelling.
- Screen out unfinished pieces if you want a finer material.
Apply finished compost as a modest surface layer or mix it into the top of a bed, following local advice. Don’t bury thick layers of unfinished compost around roots. The Cornell Waste Management Institute provides detailed composting resources.
Composting Troubleshooting and Common Mistakes
| Problem | Likely cause | What to try |
|---|---|---|
| Rotten or ammonia-like smell | Too wet, too much nitrogen-rich material, or poor airflow | Add browns and aerate |
| Dry, inactive pile | Too little moisture or nitrogen-rich material | Add water and greens |
| Pile attracts animals | Food scraps exposed or unsuitable materials included | Cover scraps, use a secure bin, exclude meat and dairy |
| Finished compost contains large pieces | Not fully decomposed or not screened | Return coarse material to the active pile |
| Plants struggle after compost use | Compost may be immature, salty, or contaminated | Stop using it; assess the material and seek local advice |
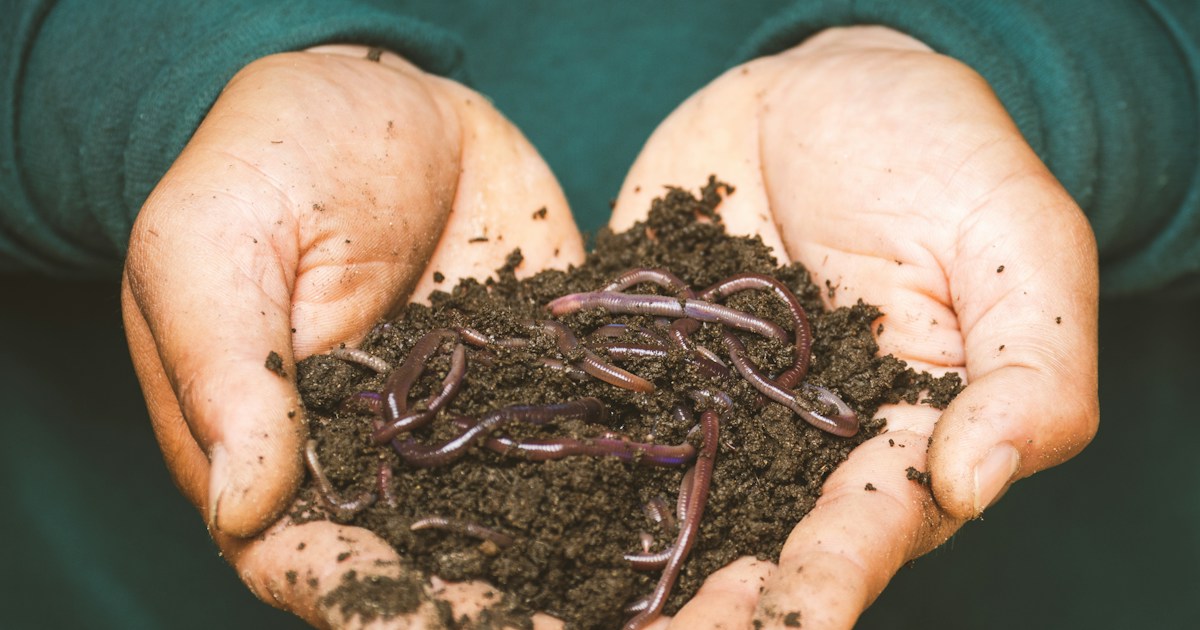
Vermicomposting is another option for small spaces. Red worms can process suitable food scraps in a managed bin, but they need appropriate bedding, moisture, and temperature. Learn the basics from the University of Maryland Extension’s composting resources.
🌾 Organic Fertilizers and Natural Soil Amendments
Compost improves soil and can supply nutrients, but it may not meet every crop’s needs. The sensible approach is test, observe, and target—not pour on fertilizer because a plant looks vaguely disappointed.
Compost, Manure, and Other Organic Matter
Compost, aged manure, leaf mold, and other organic materials can improve soil structure and support biological activity. Their nutrient levels vary according to feedstock, handling, and maturity.
- Use well-composted or properly aged manure for garden beds.
- Follow local food-safety recommendations, particularly for crops eaten raw.
- Don’t assume manure is nutrient-balanced or free of weed seeds, pathogens, or contaminants.
- Avoid fresh manure in contact with edible crops; use the appropriate waiting period and local guidance.
The National Organic Program’s standards govern inputs used by certified organic operations. Home gardeners should still read labels and choose sources carefully.
Organic Fertilizer Types and When to Use Them
Organic fertilizers can include plant-, animal-, or mineral-derived ingredients. Examples include fish emulsion, kelp products, alfalfa meal, blood meal, bone meal, and blended organic fertilizers. Each has different nutrient content and release characteristics.
| Product type | Common role | Caution |
|---|---|---|
| Finished compost | Soil conditioning; variable nutrient contribution | Not a guaranteed complete fertilizer |
| Fish emulsion | Fast-acting liquid nutrients, often nitrogen-rich | Can smell; follow label and avoid runoff |
| Kelp or seaweed fertilizer | Supplies certain nutrients and trace elements | Not a substitute for correcting every deficiency |
| Bone meal | Phosphorus source | Use only when soil testing indicates a need |
| Blood meal | Nitrogen source | Can over-supply nitrogen if misused |
| Organic blended fertilizer | Convenient, formulated nutrient mix | Read analysis and crop directions carefully |
Organic sources are not automatically gentle. Excess fertilizer—organic or synthetic—can damage roots, cause nutrient imbalances, and contribute to runoff. The University of Minnesota Extension fertilizer guidance recommends matching fertilizer to crop and soil needs.
How to Read Fertilizer Labels and Avoid Overfeeding
Fertilizer labels show an N-P-K analysis: nitrogen (N), phosphate (P₂O₅), and potash (K₂O). The numbers describe the product’s guaranteed nutrient content, not a quality score.
Before applying fertilizer:
- Review your soil test.
- Identify the crop’s nutrient needs and growth stage.
- Check the product analysis and label instructions.
- Apply the recommended amount evenly.
- Keep fertilizer off plant stems and avoid application before heavy rain.
- Record the application so you don’t repeat it by accident.
Too much nitrogen can produce lush leaves and fewer fruits, while excess phosphorus can accumulate in soil and move into waterways. If the leaves are pale or growth is slow, diagnose light, water, root health, temperature, and pests before reaching for fertilizer.
🍂 Mulching for Moisture, Weds, and Soil Health
Mulch covers bare soil, moderates temperature, slows evaporation, and can suppress weeds. Organic mulches also decompose and contribute organic matter. It’s one of our favorite low-tech garden helpers—less glamorous than a new tool, but far better at quietly doing the work.
Best Organic Mulches for Vegetable Gardens
| Mulch | Useful for | Notes |
|---|---|---|
| Clean straw | Vegetable beds and paths | Check that it is seed-free and suitable for edible gardens |
| Shredded leaves | Beds, pathways, and winter cover | Shred first to reduce mating |
| Finished compost | Beds and around established plants | Adds organic matter; may not control weeds as well as coarser mulch |
| Grass clippings | Thin layers around crops | Use untreated clippings; thick layers can mat |
| Wood chips | Paths and perennial areas | Usually better on paths or around woody plants than mixed into annual beds |
| Pine needles | Some beds and paths | Their effect on soil pH is often overstated; use according to local availability |
Mulch choice depends on crop, climate, and material quality. Don’t use bark or wood chips as though they were a universal vegetable-bed fertilizer; they’re often more useful as surface cover or pathway material.
When and How to Apply Mulch
- Weed the bed first.
- Water the soil if it is dry.
- Apply mulch in an even layer, leaving space around plant stems.
- Check moisture beneath the mulch before watering again.
- Top up as it thins or decomposes.
A common starting depth is about 2–4 inches, adjusted for the material and plant. Fine mulch may need a thinner layer to avoid mating; chunky mulch may need more. Keep mulch away from stems and trunks to reduce rot and provide airflow.
💧 Watering and Caring for Organic Garden Plants
Water is often the difference between a thriving garden and a collection of dramatic, droping leaves. But more water isn’t always better. Roots need both moisture and oxygen, so the goal is consistent moisture without waterlogging.
How Often to Water a Vegetable Garden
There is no reliable universal schedule. Soil type, weather, plant age, crop, bed depth, and mulch all affect watering needs. Check the soil a few inches below the surface and observe plants in the morning.
- Newly sown seeds: Keep the seed zone evenly moist; it may need frequent, light watering.
- New transplants: Water thoroughly at planting and monitor closely while roots establish.
- Established crops: Water deeply enough to moisten the root zone, then allow the surface to dry somewhat between waterings where appropriate.
- Containers: Check more frequently because small pots dry quickly.
Wilting during hot afternoon sun does not always mean a plant needs water. If the soil is moist, the plant may be temporarily losing water faster than its roots can supply it. Check again in the evening or morning.
The University of California Agriculture and Natural Resources offers guidance on water management and plant stress.
Drip Irrigation, Soaker Hoses, and Water-Saving Tips
Drip lines and soaker hoses deliver water near the soil, reducing wet foliage and evaporation. They can be especially helpful in warm, dry climates or for gardeners who struggle to keep up with hand-watering.
Practical tips:
- Water early in the day when possible.
- Place water near roots rather than spraying leaves.
- Use mulch to reduce evaporation.
- Check emiters and hoses for leaks or blockages.
- Adjust watering after rain rather than following a timer blindly.
- Group plants with similar water needs together.
Drip irrigation can use water efficiently when designed and maintained well, but it isn’t “set and forget.” A clogged emitter can leave one plant parched while its neighbor gets a spa day.
Weding Without Synthetic Herbicides
Weds compete with crops for light, water, and nutrients. Young weeds are easier to remove, so short, regular sessions beat one heroic, mud-caked weekend.
- Pull or hoe weeds while small.
- Remove perennial weeds with as much root as practical.
- Mulch bare soil to suppress new growth.
- Keep garden paths distinct from growing beds.
- Don’t let weeds set seed.
- Use hand tools carefully around crop roots.
Avoid using household substances such as salt or vinegar as casual weed killers; they can damage soil, nearby plants, and surfaces. For more sustainable household practices, explore Gone Greenish’s Conservation Tips.
Pruning, Staking, and Supporting Crops
Support crops before they flop. Install tomato cages, trellises, or stakes while plants are small enough to handle without damaging roots.
- Tomatoes: Choose support based on variety; indeterminate tomatoes generally need substantial staking or caging.
- Climbing beans and peas: Add neting or a trellis before vines begin reaching.
- Cucumbers: A trellis can improve airflow and make fruit easier to find.
- Squash: Bush varieties may need little support; sprawling varieties need space.
Pruning is crop-specific. Remove diseased or badly damaged material, but don’t strip leaves indiscriminately: leaves make the energy the plant needs to grow fruit.
🔄 Crop Rotation and Succession Planting
Crop rotation and succession planting solve different problems. Rotation changes what grows in a bed from year to year. Succession planting schedules new sowings or crops over a season so the garden keeps producing.
Why Crop Rotation Helps Prevent Pests and Disease
Related crops often share pests and diseases. Growing tomatoes in the same bed year after year can encourage problems that persist in soil or plant debris. Rotating by plant family helps disrupt those cycles and can balance nutrient demand.
Rotation is not guaranteed pest control, especially in a small garden where insects can travel between beds. Still, it’s a useful prevention tool when combined with sanitation, suitable varieties, and monitoring.
A Simple Crop Rotation Plan for Beginners
Group crops into broad families:
| Crop group | Examples |
|---|---|
| Nightshades | Tomatoes, peppers, potatoes, eggplant |
| Cucurbits | Cucumbers, squash, pumpkins, melons |
| Brassicas | Cabbage, broccoli, kale, radishes |
| Legumes | Peas, beans |
| Roots and alliums | Carots, bets, onions, garlic |
| Leafy greens | Lettuce, spinach, chard |
A simple four-bed plan can move groups each year:
| Year | Bed A | Bed B | Bed C | Bed D |
|---|---|---|---|---|
| 1 | Nightshades | Legumes | Brassicas | Roots and alliums |
| 2 | Legumes | Brassicas | Roots and alliums | Nightshades |
| 3 | Brassicas | Roots and alliums | Nightshades | Legumes |
| 4 | Roots and alliums | Nightshades | Legumes | Brassicas |
Treat this as a planning aid, not a rigid law. In a small garden, rotate the crops you can and remove diseased plant debris responsibly.
Succession Planting for a Longer Harvest
Rather than sowing every radish or lettuce seed one Saturday, plant small batches at intervals. You can also follow an early crop with a later one when space opens.
Examples:
- Sow lettuce in small batches every couple of weeks during suitable weather.
- Follow early spinach or radishes with beans or another warm-season crop.
- Replant a harvested bed with a cool-season crop in late summer where the climate allows.
- Use varieties with different maturity times to spread harvests.
Check days to maturity and local frost dates, because late plantings may not have enough time to finish.
🤝 Companion Planting in the Organic Garden
Companion planting groups plants based on possible benefits such as habitat, shade, or use of space. Some combinations are sensible, but not every popular pairing has strong evidence behind it. Treat companion planting as garden design, not magic.
Companion Planting Combinations That Make Sense
- Flowers among vegetables: Can provide nectar or pollen for beneficial insects when the flowers are accessible and bloom at the right time.
- Taller crops with lower crops: Can use space efficiently if the taller plants don’t shade sun-loving neighbors.
- Trellised crops beside compact crops: May increase vertical growing space in a small garden.
- Herbs near frequently harvested crops: Convenient for cooking and observation, even if pest-deterrent claims vary.
The classic “three sisters” planting—corn, beans, and squash—has cultural significance and can work under suitable conditions, but it requires appropriate varieties, climate, spacing, and soil fertility. It’s not a plug-and-play kit for every backyard.
What Companion Planting Can—and Cannot—Do
Companion plants may attract beneficial insects, create habitat, or help you make better use of space. Claims that one plant reliably repels a particular pest can be overstated. Strong evidence varies by pairing, pest, and environment.
Use companion planting to:
- Increase floral diversity.
- Place crops together according to light and water needs.
- Use trellises and bed space efficiently.
- Support pollinators and predators.
Don’t rely on a companion plant instead of crop rotation, row covers, sanitation, or accurate pest identification.
🐞 Beneficial Insects and Garden Biodiversity
A healthy garden is not an insect-free garden. Pollinators help many crops reproduce, while predators and parasitoids can reduce pest populations. Our aim is to make the garden welcoming to useful wildlife without pretending that every insect will behave like a hired employee.
How to Atract Pollinators and Predatory Insects
Provide:
- A sequence of flowers blooming through the growing season.
- Plants with varied flower shapes and sizes.
- Water in a shallow dish with stones or landing spots.
- Safe shelter, such as undisturbed stems or leaf litter in appropriate areas.
- Reduced pesticide use, especially on flowering plants.
Choose native plants suited to your region when possible. The Xerces Society offers pollinator-conservation resources, and Gone Greenish’s Biodiversity Conservation section has more ways to support local life.
Recognizing Helpful Garden Insects
| Helpful organism | What it may do | What to look for |
|---|---|---|
| Lady beetles and larvae | Eat aphids and other soft-bodied pests | Larvae are elongated and dark, not miniature adult beetles |
| Lacewing larvae | Feed on aphids, mites, and small insects | Often called “aphid lions” |
| Hoverfly larvae | Some species consume aphids | Adults resemble small bees or wasps but hover |
| Ground beetles | Eat some pest insects and larvae | Often active at night, shelter under debris |
| Parasitic wasps | Lay eggs in or on host insects | Usually tiny; many are harmless to people |
| Bees and other pollinators | Pollinate many flowering crops | Support with flowers and avoid harmful sprays |
Before removing an unfamiliar insect, take a photo and use a reliable extension identification resource. The bug might be doing useful work while you’re reaching for the spray bottle.
Creating Habitat with Flowers, Hedges, and Water
A little habitat diversity helps: flowering plants, small water sources, and undisturbed refuge areas can support wildlife. Keep water shallow and clean it regularly to reduce mosquito breeding. Leave some stems and leaf litter over winter where appropriate, while removing material that is diseased or likely to harbor serious pests.
Use regionally appropriate plants rather than relying on a generic “pollinator mix.” Seed mixes vary, and some may contain species unsuitable or invasive in particular areas. Check with your local native-plant society or extension service.
🐛 Natural Pest Control and Organic Disease Management
Organic pest management starts before pests appear. Healthy plants, appropriate varieties, clean tools, crop rotation, barriers, and regular scouting all reduce the odds of a small issue becoming a garden emergency.
The Organic Integrated Pest Management Approach
Integrated pest management (IPM) combines prevention, monitoring, identification, and targeted action. The US EPA’s IPM overview explains the approach.
A practical sequence:
- Prevent: Choose suitable varieties, rotate crops, space plants for airflow, and keep soil healthy.
- Monitor: Inspect leaves, stems, undersides, and new growth regularly.
- Identify: Confirm the pest or disease before choosing a response.
- Set a threshold: Decide whether the problem is actually damaging enough to treat.
- Use low-impact controls first: Hand-pick, wash pests off, prune affected leaves, or use barriers.
- Escalate selectively: If needed, use an appropriate labeled product as directed.
- Review: Record what worked and adjust next season.
Preventing Common Vegetable Garden Pests
- Use row covers to exclude certain insects, installing them before pests arrive and securing the edges.
- Choose varieties with resistance to locally common diseases.
- Rotate plant families where possible.
- Remove heavily diseased plant material; don’t compost it unless your composting process is suitable.
- Keep plants appropriately spaced for airflow.
- Inspect the undersides of leaves and the growing tips.
- Encourage natural enemies with diverse flowering habitat.
Pest timing matters. A cover placed over plants after a pest has already laid eggs may trap the problem inside. Know what you’re excluding and when it arrives.
Identifying and Managing Plant Diseases
Common signs include leaf spots, mildew, wilting, stem lesions, and unusual yellowing. The same symptom can have several causes—disease, nutrient imbalance, watering stress, or insect damage—so diagnosis matters.
Try these steps:
- Photograph the whole plant and the affected area.
- Note recent weather and watering.
- Check whether symptoms are spreading or limited to older leaves.
- Compare with a trusted extension diagnosis guide.
- Remove affected material when appropriate and avoid weting foliage late in the day.
- Clean tools between plants if disease is suspected.
The Cornell Cooperative Extension Plant Disease Diagnostic Clinic is one example of a university diagnostic resource; gardeners elsewhere should contact their local extension service.
Physical Bariers, Hand-Picking, and Other Controls
Physical and mechanical controls can be highly effective when used early:
- Hand-pick large visible insects and egg masses.
- Use a strong but gentle stream of water for some soft-bodied pests.
- Place collars around seedlings when cutworms are a known problem.
- Use insect neting or row covers for appropriate crops.
- Remove badly infested leaves when doing so won’t harm the plant.
- Use traps only when they’re appropriate for the target pest.
Diatomaceous earth can irritate or harm beneficial insects and is ineffective when wet; avoid dusting flowering plants or applying it indiscriminately. “Natural” does not mean harmless.
Using Organic Pesticides Responsibly
If prevention and physical controls aren’t enough, choose a product labeled for the crop and pest. Products such as insecticidal soap, horticultural oils, or Bacillus thuringiensis (Bt) have specific uses and limitations. They may harm non-target organisms if misaplied.
Always:
- Read the complete label and follow all directions.
- Confirm the product is permitted for the crop and target pest.
- Avoid spraying pollinators or flowering plants when bees are active.
- Wear required protective equipment.
- Keep products away from children and pets.
- Don’t mix homemade sprays unless you understand their risks and plant effects.
The National Pesticide Information Center provides pesticide safety information. For certified organic production, verify an input’s status with the relevant certifier; a product marketed as “natural” is not automatically approved.
🚫 Avoiding Synthetic Fertilizers, Pesticides, and Herbicides
Reducing reliance on synthetic inputs is a core organic-gardening goal, but it helps to be accurate: risk depends on the substance, dose, timing, exposure, and environment. Avoid sweeping claims that every synthetic product causes the same harm. Instead, prevent unnecessary use and choose the least disruptive effective practice.
What “Organic” Means for a Home Garden
A home garden is not automatically certified just because you use compost or avoid synthetic pesticides. Certification is a formal process with standards, records, and oversight. For gardeners at home, “organic” usually describes a set of practices rather than a legal certification status.
The USDA’s organic standards and labeling information explains regulated certification. Certified organic growers may use certain approved inputs under specified conditions, so “organic” does not mean “no pesticides.” It means the operation follows the applicable standards.
Safer Choices for Garden Inputs
Before buying or applying an input:
- Identify the actual garden problem.
- Check your soil test and crop needs.
- Prefer cultural or physical controls when effective.
- Read the label, including precautions for pollinators and waterways.
- Use only the amount and method directed.
- Store and dispose of products safely.
Avoid adding fertilizer, lime, or pesticide as a routine “just in case.” Prevention and observation are cheaper in environmental terms and often easier on the garden.
🥕 Harvesting and Storing Organic Garden Produce
Harvesting at the right time improves flavor and encourages continued production for many crops. It also helps you avoid finding a zucchini that has quietly become a small canoe.
When and How to Harvest Vegetables
Check seed packets or trusted crop guides for maturity, but use the plant itself too. Harvest leafy greens young and regularly; pick beans while pods are tender; harvest tomatoes according to variety and intended use.
- Use clean scissors or pruners for crops that bruise or tear easily.
- Harvest during the cool part of the day when practical.
- Pick regularly from crops that produce over a long period.
- Avoid harvesting wet plants when possible, which can help reduce spread of disease.
- Leave enough healthy foliage for the plant to continue growing.
The University of Maryland Extension harvest guide offers crop-specific advice.
Washing, Storing, and Preserving Your Harvest
Wash produce under clean running water before eating or preparing it. Don’t use soap or household cleaning products on food. Store crops according to their needs: some prefer refrigeration, while others keep better in a cool, dry, well-ventilated place.
For food preservation, use tested recipes and current food-safety guidance. The National Center for Home Food Preservation provides reliable instructions for caning, freezing, drying, and storing produce.
Saving Seeds for Next Season
Seed saving is easiest with crops that are open-pollinated and self-pollinating, such as beans, peas, and some tomatoes. Cross-pollinating crops may need isolation or careful selection to produce seed true to type.
- Save seed only from healthy, well-performing plants.
- Label variety and harvest date.
- Dry seeds thoroughly before storage.
- Store in a cool, dry, dark place.
- Check whether the variety is hybrid before saving.
The Seed Savers Exchange has practical seed-saving information.
❄️ Seasonal Organic Garden Care
Good garden care follows the season rather than a fixed checklist. Your climate, frost dates, rainfall, and crop choices determine what needs attention.
Spring Garden Preparation
- Test soil if you haven’t done so recently.
- Clear only what needs removing; preserve useful habitat where safe.
- Add mature compost according to soil needs.
- Prepare beds when soil is workable, not saturated.
- Sow cool-season crops at locally recommended times.
- Check irrigation and supports before plants get large.
Summer Garden Maintenance
- Inspect plants regularly for pests, disease, and water stress.
- Keep mulch topped up without piling it against stems.
- Harvest frequently and remove damaged produce.
- Support tall or climbing crops.
- Re-sow quick crops where weather allows.
- Provide shade for heat-sensitive greens if needed.
Fall Cleanup and Winter Soil Protection
Remove diseased plants and crops that are harboring serious pests. Healthy plant residues can be composted if your system is suitable. Protect bare soil with clean mulch or a cover crop selected for your region.
Leaving some stems and leaf litter can provide overwintering habitat, but balance wildlife benefits with plant health and local pest concerns. The right approach is selective, not “clean every twig” or “leave absolutely everything.”
🪴 Organic Gardening in Containers and Small Spaces
A small garden can produce herbs, salads, tomatoes, peppers, and other crops without a yard. The main challenge is managing root space, light, drainage, and frequent watering.
Choosing Pots, Planters, and Organic Poting Mix
Choose containers with drainage holes and enough volume for the crop. Avoid garden soil alone in pots; it can compact and drain poorly. Use a quality poting mix suitable for edible plants, and check the label for ingredients and intended use.
- Small pots suit herbs and some greens.
- Larger containers suit tomatoes, peppers, and compact squash varieties.
- Fabric grow bags drain well but may dry faster.
- Dark containers can heat up in strong sun.
- Add saucers only if they don’t leave roots sitting in standing water.
Best Vegetables for Containers
| Crop | Container-friendly choice | Helpful note |
|---|---|---|
| Lettuce and leafy greens | Loose-leaf varieties | Partial shade can help in hot weather |
| Herbs | Basil, parsley, chives | Group by similar water needs |
| Tomatoes | Compact or patio varieties | Provide support and a suitably large pot |
| Peppers | Compact varieties | Warm, sunny placement helps |
| Radishes | Small, quick-growing varieties | Keep the growing medium evenly moist |
| Bush beans | Dwarf varieties | Needs enough sun and a pot with adequate depth |
Read the seed packet for spacing and container suitability. “Compact” plants still need root room.
Balcony, Patio, and Vertical Gardening Ideas
Use a trellis for climbing beans, cucumbers, and some tomatoes, but secure it against wind. Arrange containers so tall plants don’t shade shorter ones. If your balcony is exposed, choose sturdy pots and confirm any building rules about weight or water runoff.
A few well-managed containers are often easier than a crowded collection of pots that need watering twice a day. Start with the space you can comfortably care for.
🌍 Sustainable Gardening: Water, Wildlife, and Waste
Organic gardening can support sustainability, but the details matter. A garden can conserve water and create habitat—or waste resources if it relies on thirsty crops, disposable supplies, and poorly targeted inputs.
Rainwater Harvesting and Water Conservation
Rain barrels can capture roof runoff for garden use where local rules and water quality permit. Keep barrels covered, screened, and maintained. Don’t use collected water on edible plant parts if the system or roof material may contaminate it; follow local public-health advice.
Other ways to conserve water:
- Mulch soil.
- Water near plant roots.
- Fix leaks promptly.
- Choose crops that suit local rainfall and climate.
- Use drip irrigation where appropriate.
- Group plants by water needs.
Reducing Garden Waste and Reusing Materials
Compost suitable plant scraps, reuse durable containers, and select tools that can be repaired. Avoid reusing containers that may leach harmful chemicals or that previously held hazardous products.
For broader household habits, see Gone Greenish’s Conservation Tips and Eco-Conscious Brands categories.
Gardening for Soil Carbon and Local Wildlife
Keeping living roots in soil, using cover crops, reducing unnecessary disturbance, and maintaining organic matter can support soil health. The amount of carbon stored depends on soil, climate, management, and time; avoid assuming every garden practice guarantees a specific climate benefit.
Plant native flowers and shrubs where practical, reduce unnecessary lighting, provide safe water, and avoid broad-spectrum pesticide use. Gardening is one small piece of the larger picture, alongside choices discussed in Gone Greenish’s Climate Change collection.
🧰 Organic Gardening Tools and Supplies
You don’t need a shed full of shiny equipment. Start with a few durable tools that fit your garden size and your hands.
Essential Tools for a Beginner Gardener
- Hand trowel
- Watering can or hose with a gentle nozzle
- Hand pruners
- Gloves, if you prefer them
- A hoe or hand weder for beds
- A compost bin or simple composting setup, if appropriate
- Plant labels and a garden notebook
- Sturdy supports for climbing or tall crops
Real brands to compare include Fiskars garden tools and Gardener’s Supply Company. Brand quality varies by tool and model; prioritize comfortable grip, replaceable parts, and a tool that suits the job.
Useful Supplies You Can Skip at First
You can usually delay buying:
- A large range of fertilizers before testing soil
- Multiple pest sprays “just in case”
- Specialty gadgets with overlapping functions
- Seed-starting equipment if you’re buying transplants
- Large quantities of amendments before checking what your soil needs
If you do start seeds indoors, basic trays and a bright, reliable light source may be more useful than an elaborate kit. Keep products and tools stored safely, especially around children and pets.
⚠️ Common Organic Gardening Mistakes and How to Fix Them
| Mistake | Why it causes trouble | Better approach |
|---|---|---|
| Starting too large | Weding and watering become overwhelming | Begin with a small bed or a few containers |
| Planting without checking sunlight | Fruiting crops may produce poorly | Track direct sun before choosing crops |
| Applying fertilizer by guesswork | Can create nutrient imbalances or runoff | Test soil and follow label directions |
| Overwatering | Roots need oxygen; sogy soil can encourage disease | Check moisture before watering |
| Using fresh manure casually | Food-safety and plant-health risks | Use properly composted or aged material and local guidance |
| Treating all insects as pests | Harms pollinators and natural predators | Identify the insect and assess damage first |
| Ignoring spacing | Crowded plants compete and have poor airflow | Follow seed instructions and thin seedlings |
| Choosing crops you don’t eat | Harvests become chores rather than food | Grow a few favorites |
| Leaving soil bare | Increases erosion, evaporation, and weeds | Use suitable mulch or cover crops |
| Expecting organic methods to eliminate all pests | Nature doesn’t offer a zero-insect guarantee | Aim to prevent serious damage and preserve balance |
The beginner mistake we see most often is not “chosing the wrong fertilizer.” It’s trying to grow too much before learning how much care the space needs. Start small, observe, and expand when your garden routine feels manageable.